
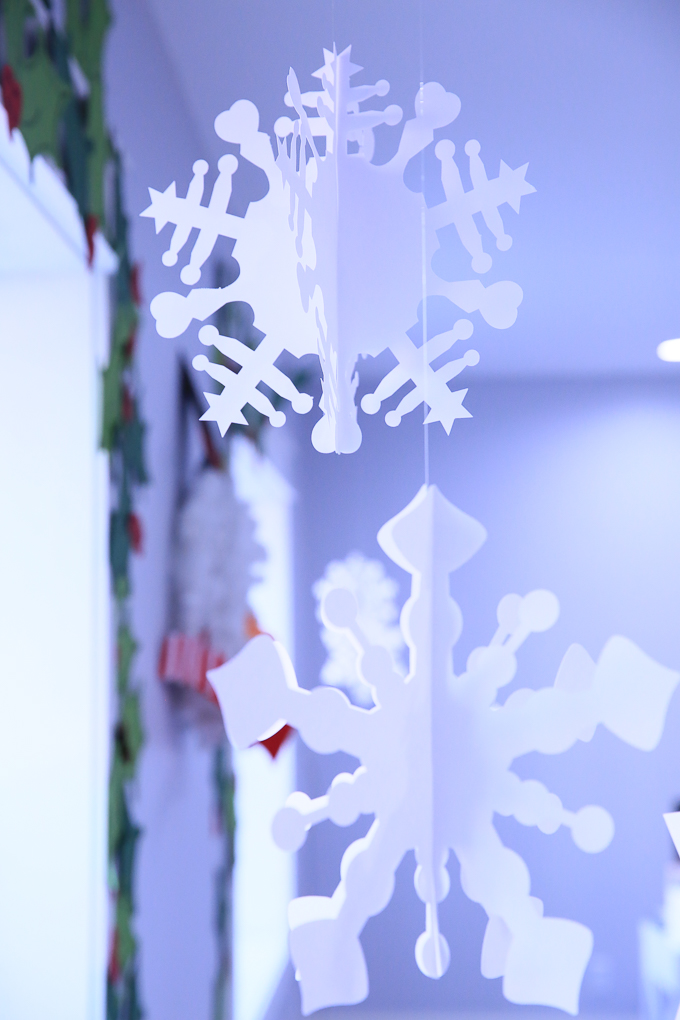
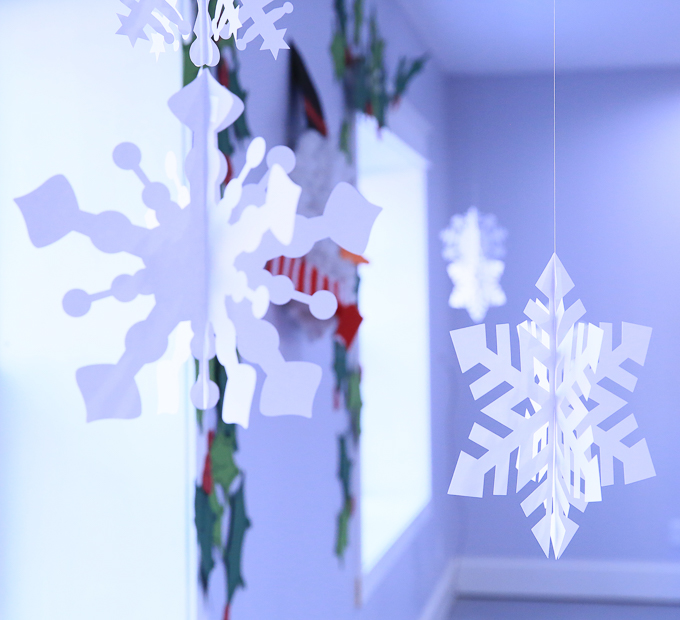
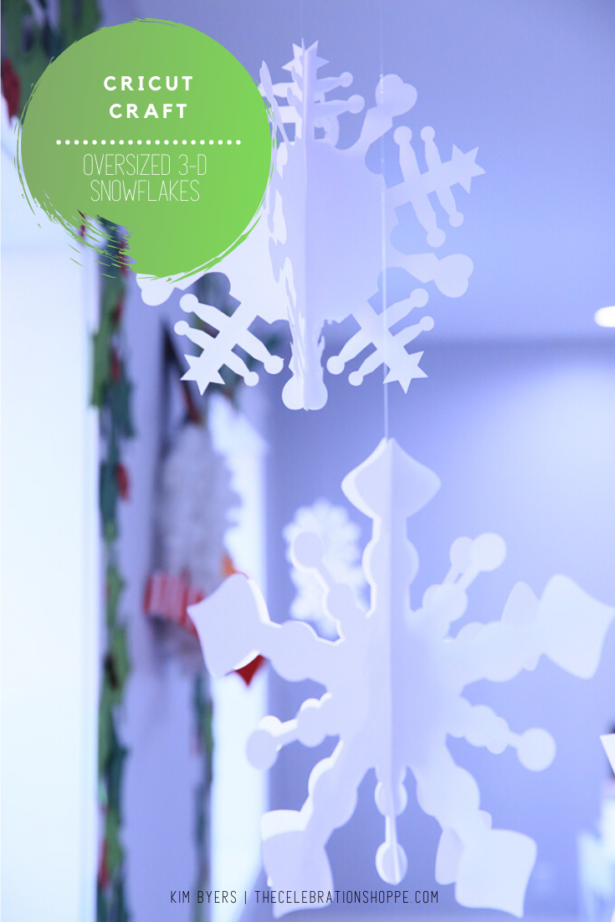
I have a love for paper crafts, and this time of year I like to make big statements with my holiday decor using my Cricut Explore Air 2. This year, I created oversized 3-D snowflakes, holly garland and glittery window cling snowflakes for my studio windows and I couldn’t be more thrilled with how it turned out. It will be the perfect backdrop for my annual Christmas cookie party next weekend!
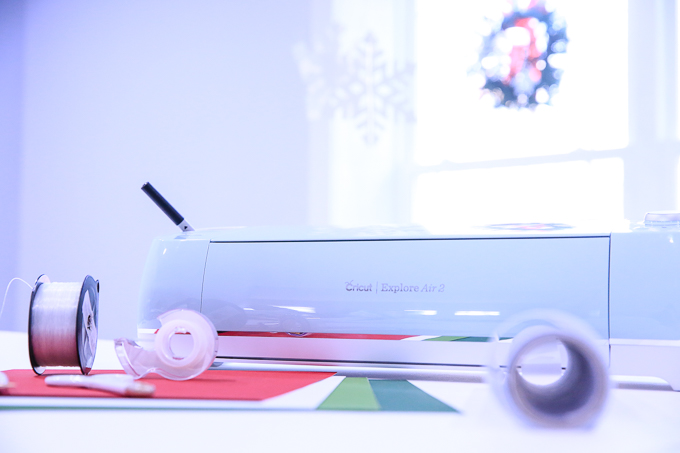
You can make these lovely crafts in minutes with the Cricut Explore Air 2. Honestly I usually spend more time planning out my craft than I do creating it because my Cricut moves so fast, especially when I choose to speed it up with the 2X cut option.
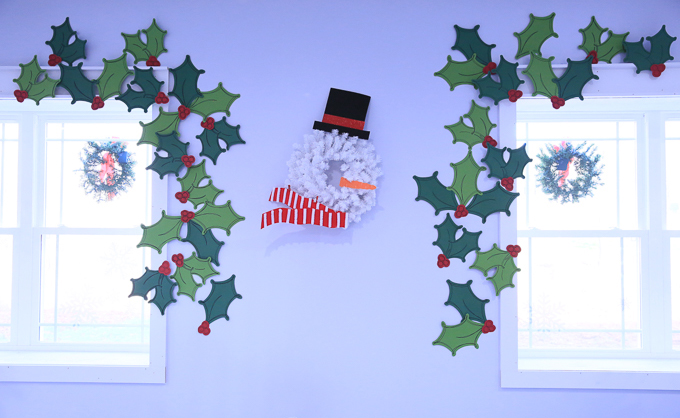
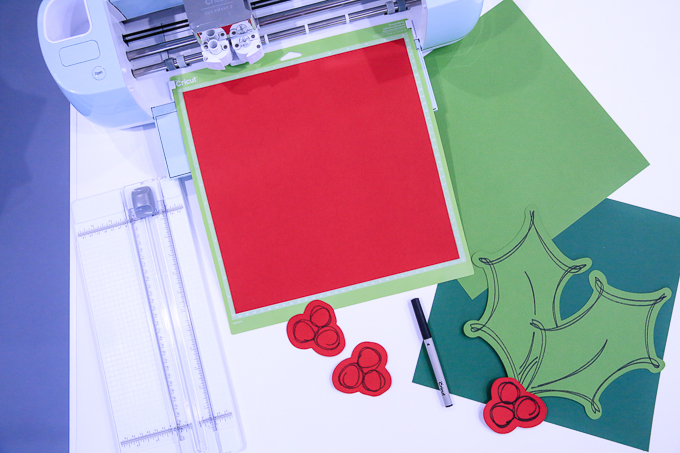
In addition to the snowflakes, I made this enormous holly garland and I’m smitten!
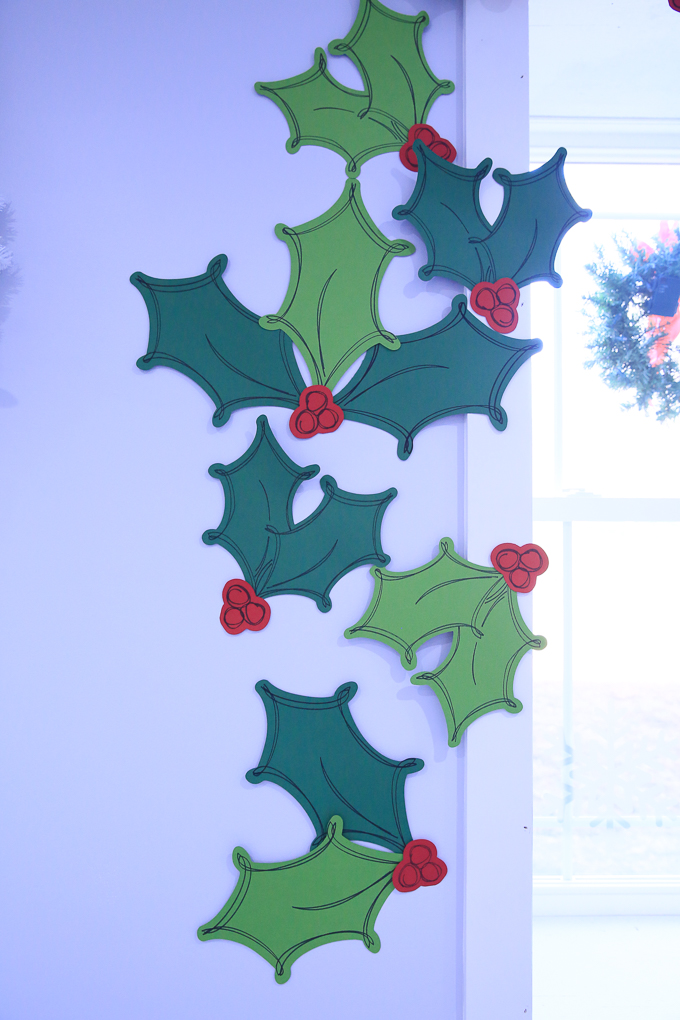
It’s so easy to make with three shades of cardstock and the calligraphy pen. I like how the ink makes the details pop and you don’t have to use two layers of paper!
Here’s a look at how it came together on the wall.
And in addition to all this, I cut small and large (up to 12×12) window cling snowflakes in glitter white, white and silver. When living in the south sometimes we have to make our own white Christmas! {wink}
And I use my Cricut BrightPad every time I cut out vinyl, iron-on or window cling. It makes the task quick and simple!
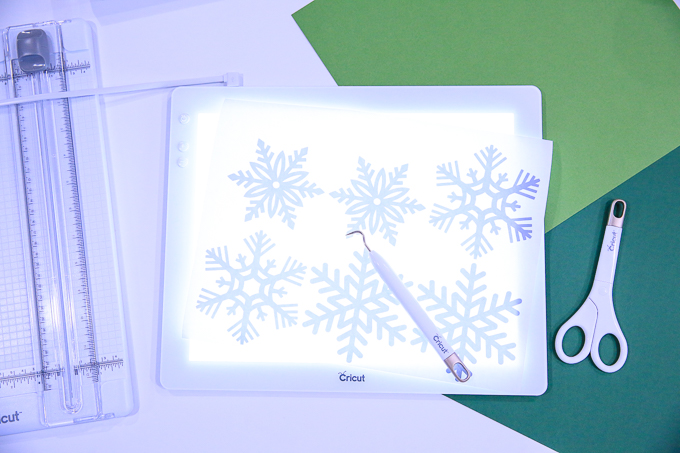
Let’s Make Oversized 3-D Snowflakes
For the large paper 3-D snowflakes, you’ll need white cardstock (or pink, or blue… get creative!), and a few more things:
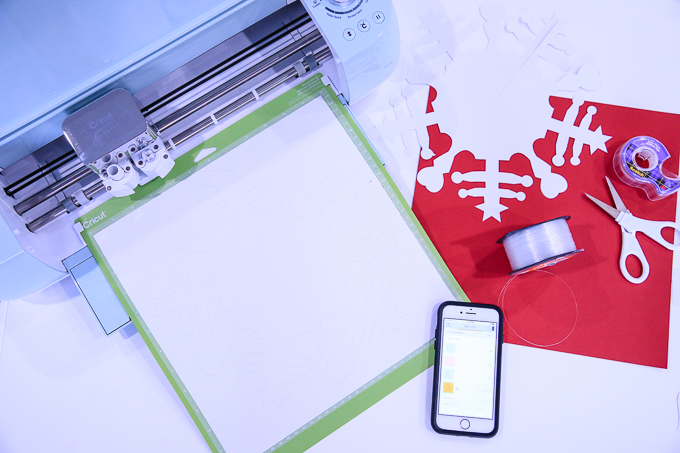
- Cricut Explore Air 2
- Standard Mat
- Clear Fishing Line
- Clear Gift Wrap Tape
- Cardstock
- Design Space File
The steps are super simple.
- Cut – cut each file. There are two cuts per snowflake.
- Tape – match the edges & tape.
- Hang – attach clear fishing line to the center of snowflake and hang from the ceiling. They’re so light you can use a small piece of the gift wrap tape!
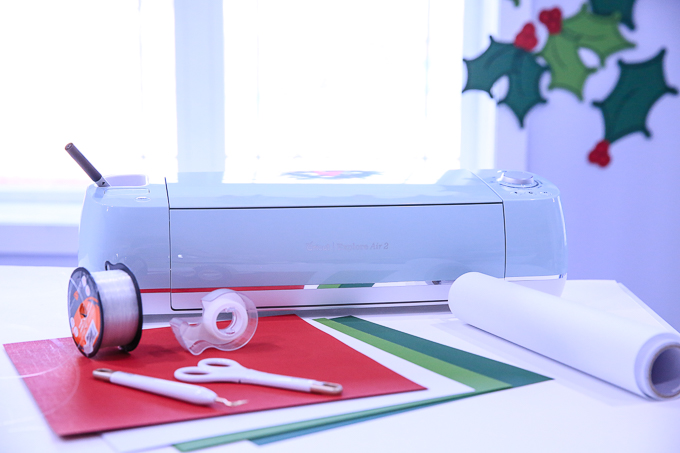
Let’s Make Oversized Holly Garland
For the holly garland, you’ll need at least three colors of cardstock and the Cricut Calligraphy Pen:
The steps are super simple:
- Cut – Cut out holly, rotating between two shades of green. I used 12 sets for each window.
- Cut – Cut berries out of the red cardstock.
- Assemble – simply use giftwrap tape to adhere the holly to the wall and to itself. The paper is so light it will stay in place!

Don’t have a Cricut yet. Want one?!
Enter below for a chance to win:
More Projects To Make With Cricut
If you have a Cricut, I’d love to craft with you! If you don’t, you really need one! Here are just a few of the projects you can make:
- Amazing Grace Graphic Tee & Free SVG Cut File
- Darling Personalized Backpack in Minutes
- Monogrammed Rain Boots With Cricut
- Baby Shower Bee Hive Cupcake Toppers
- Baby Shower Bee Invitation
As always, I hope you’re inspired to craft, bake, create and celebrate!
INSTAGRAM | FACEBOOK | PINTEREST | GOOGLE+ | TWITTER | YOUTUBE | BLOGLOVIN
Thank you for supporting my wonderful sponsors. They make it possible for me to keep the ideas coming! All content, ideas, photography and opinions are that of my own and I’d have it no other way! There are affiliate links in this post, of which we do earn a small fee at no cost to you.
Oversized 3-D Snowflakes & Holly Garland – Paper Crafts With Cricut seen first on The Celebration Shoppe.
This is a sponsored conversation written by me on behalf of Cricut. The opinions and text are all mine.
 Frosty Snowman Slime Jars with Elmer’s