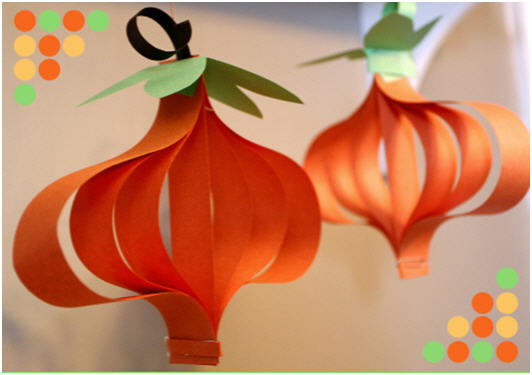
Browsing around this morning I found these adorable DIY paper pumpkin lanterns on the hostess blog (from three wheels turning). The kids will have a blast making this super easy papercraft!
Here’s what you’ll need:
• 1-2 pieces of orange construction paper
• 1 piece of green construction paper
• 1 piece of brown construction paper
• scissors
• paper cutter (optional)
• paper clips and/or stapler
• string
And here are the simple steps:
- Cut the orange pieces of construction paper into 1″ wide strips (each strip will be 1″ x 11″). Then, shorten some of the strips so that you have (1) 6″, (2) 7″, (2) 9″, and (2) 11″ long pieces.
- Gather the strips of paper together (with the ends flush) and place the smallest one in the middle. Order them by size so that the largest strip is on the outside. Secure with a paper clip or staple (I prefer the paper clip so that I can keep adding more elements). Line up the opposite ends so that they are together like the top.
- Cut a brown strip of paper 1/4″ by 3″ long for the stem. To make it curl, wrap the paper around a pencil and hold it in place while you count to 20 (or sing the ABC song).
Cut out two leaf shapes from the green paper (ours were sort of like pairs of bunny ears). - Add the stem, leaves, and a piece of string to the paper clip at the top.
Hang up and enjoy!
Want more Halloween craft ideas? DIY Halloween Dish Towel Apron, DIY Ghost Pillow and Tutorial, and DIY Halloween Tree Ornaments.
As always, I hope you’re inspired to craft, bake, create and celebrate!
INSTAGRAM | FACEBOOK | PINTEREST | GOOGLE+ | TWITTER | YOUTUBE | BLOGLOVIN
DIY Papercraft Pumpkin Lantern seen first on The Celebration Shoppe.


 barn cake with baby chicks