So this year my beautiful neices and nephews are joining my family for Thanksgiving dinner. We all know I love to decorate a table, but because my hubby and I both are the babies of our families our children are much younger than their cousins. My Thanksgiving kid’s table will run the gammet from a three year old toddler to a sixteen year old… oh yeah!
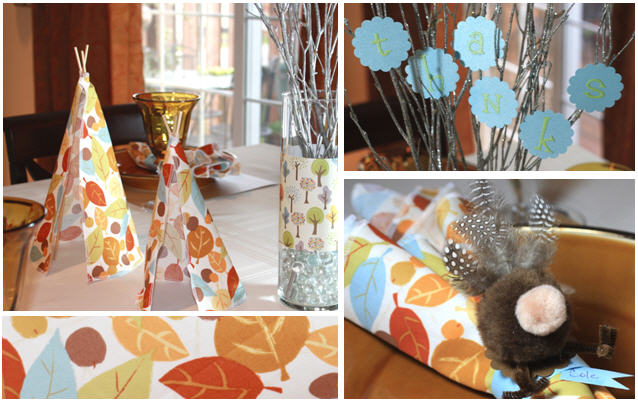
So I decided to look for some modern color combinations (light blue, brown, orange) with a little glitter for sparkle and pair it with some traditional kid type decor (teepees and turkeys). This is what I came up with and I hope they (and you) like it as much as I do. {wink}
I started by going to the fabric section of my craft store and then took my selection to the scrapbook cardstock section. I was able to find beautiful blue, green and brown shimmery cardstock and complementary fall tree design (on the vase). I used the blue for the “give thanks” centerpiece background and the napkin rings. I used the green for the letters on my “give thanks” centerpiece, and I used the brown as my placemats (wish I had gotten a shot of that for you).
The centerpiece is a simple vase with a cardstock band and glitter branches embellished with a scallop punch “give thanks.”
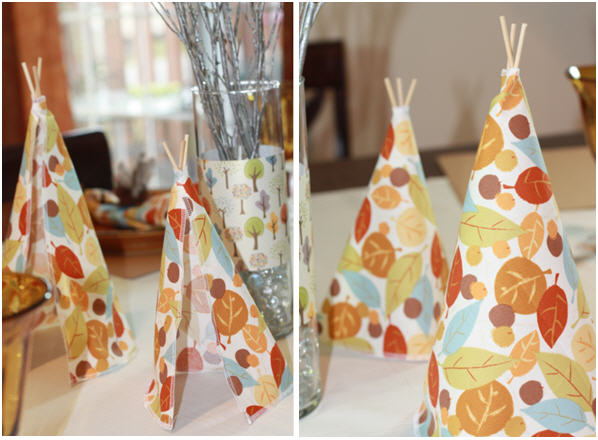
With a few swipes of the surger I made napkins out of the fabric, as well as these very fun, and slightly modern, teepees. Here’s what you’ll need to make a few of your own:
- 22″ x 18″ swatch of fabric (makes two)
- 6 thin dowels (3 for each teepee)
- fabric glue
- fabric pencil
- surger
- scissors
And here’s how you make them:
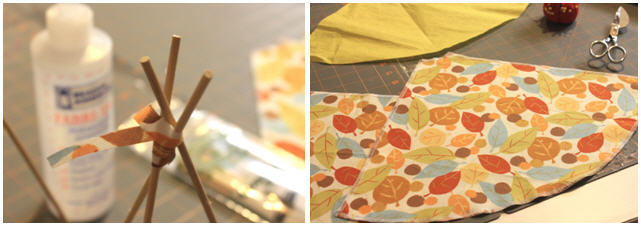
- Cut four small 1/4″ slits of your fabric.
- Arrange your teepee poles (aka dowels). Note: Mine are two differnt heights.
- Wrap the strips of fabric around your poles and tack them down to the pole and the poles to each other with fabric glue. Allow the poles to set for at least 10 minutes before applying the teepee fabric.
- The teepee itself is a fourth of a circle. My tallest one is 11″ and my shortest is 7″.
- Using your teepee poles as a guide, mark your height for each teepee. Make sure that the top of your teepee poles are placed at the corner of the fabric and stick out like they will when your craft is completed.
- Surge the fabric all the way around.
- Gently set it on your teepee frame and tack it closed at the top with fabric glue.
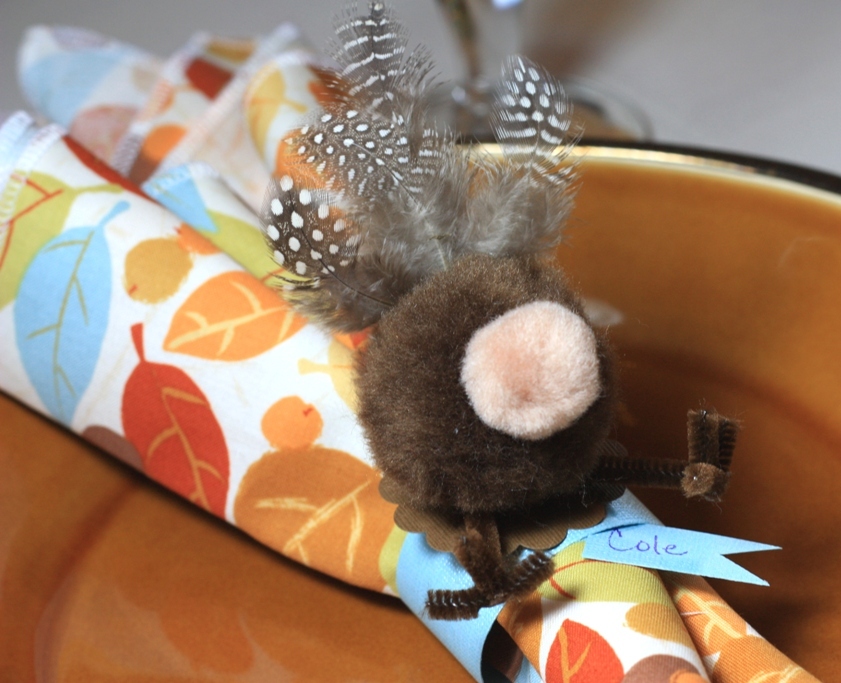
For the placecards I made little turkeys with real feathers. My boys loved picking out which ones would be at their plate… but my five year old kept calling them chickens… {wink}! Here’s what you’ll need from the craft store:
- pack of brown/black/tan feathers
- large and medium brown/black/tan pom poms
- brown pipe cleaners
- brown cardstock
- hot glue gun
- wire cutters
And here are the super simple steps to pull them together:
- Start by choosing your pom pom color combinations and your feathers. You’ll want a tall feather for the center and one or two, depending on how dense they are, for each side.
- Hot glue your feathers onto the back of your pompom and set them aside.
- Cut your turkey legs and turkey toes using a wire cutter.
- Hot glue your turkey toes to your turkey legs (and don’t burn yourself like I did!).
- Cut out circles, or scallops in my case, as your turkey base.
- Hot glue your turkey legs pointing outward slightly to the base.
- Hot glue on your turkey body and feathers.
- Finally hot glue on the turkey’s head, just on top, closer to the feathers than the feet.
I hope you have a beautiful Thanksgiving!



 raise your centerpiece this fall