
Guess what?! I’m learning to sew! My mom has “skillz!” And now she’s sharing all her tips and tricks with me. She’s shared a few things on and off throughout the years, but I’m still a total novice. Plus, when I can, I love taking the easy way out so I promise to bring as many EASY DIY ideas your way that I can.

If you like video tutorials, check out my YouTube video, and if not, you can find all the details below!
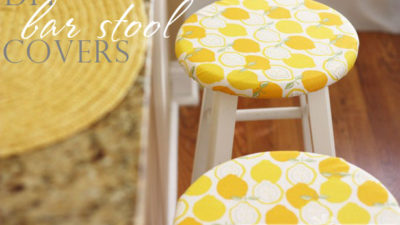
For my first sewing project, DIY round bar stool chair covers, I fell in love with this “juicy” The Alexander Henry Fabric Collection from JoAnn Fabric and Craft Stores. I like to change my kitchen colors with each season and yellow is my color this spring!

Here’s what you need: fabric, freezer paper (not wax paper), scissors, iron and elastic cord.

And here are the super easy steps (all seen in the pictorial above):
- Measure your bar stools. Mine were 14″ to the lip.
- Make a freezer paper template. Add 3″ to your stool’s diameter and divide it in half. For my stools, 14″ + 3″ = 17″/2 = 8.5″. Cut a piece of freezer paper and fold it in half twice, making a square.
- Mark the freezer paper using a ruler from the center point. For my stools, it was 8.5″ at each mark.
- Cut out the template.
- Remeasure to make sure your template is the stool’s diameter plus 3″.
- Iron the freezer paper, shiny side down, to your fabric. (NOTE: It will stick to your fabric so that you don’t have to pin the template to your fabric. PLUS, it will stick again and again so keep your template for future bar stool projects!)
- Cut the fabric.
- Peel away the freezer paper template.
- Sew the cord to the back side of the fabric using a zig zag stitch (Tip: Tie the cord at one end and hold the cord between the foot, pulling slightly.)
- Admire your handywork.
- Pull the cord to make your fabric look a bit like a shower cap and then tie the cord at the end again.

As always, I hope you’re inspired to craft, bake and create!
 peanut butter pretzel m&m bars