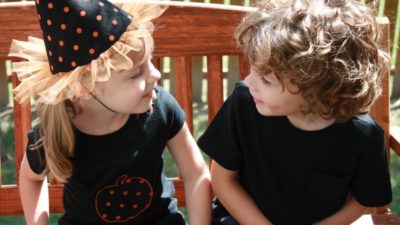
I just love this little witch hat we made for our Candy Corn Halloween collection photo shoot. It was truly easy and with another fabric choice, could be fun for a birthday hat!

Here’s what you’ll need:
- 1/2 yard fabric
- Wonder Under self adhesive
- Stretch rite elastic
- Scissors
- Fabric glue
- Tulle
- Optional: Interfacing for stiffness

And here are the simple steps (apologies for the quality of the images from the craft room, they were taken with my iPhone):
- Make an 18″ diameter circle template out of paper (I use wax paper so that they keep better), find the center point and cut the sheet in half. Using the crown of your child’s head as a guide, overlap the paper and determine what amount you should trim away (leaving you with a shape that resembles the above)
- Cut out two pieces of fabric using your template (you can use an alternate coordinating fabric for the inside of the hat if you like)
- Cut out one piece of Wonder Under using the template (Optional: If your fabric is flimsy, cut out one piece of interfacing, for stiffness, too)
- Iron Wonder Under to the “wrong” or non-pattern side of one piece of fabric
- Iron interfacing to the other fabric, again on the wrong side so that the patterned/good side shows when constructed
- Peel paper backing from Wonder Under and iron two fabrics, wrong sides together, matching the edges up exactly
- Cut 2″ strips of tulle
- Gather tulle and sew (or glue) to curved edge
- Form a cone, pipe the edge with fabric glue, overlap slightly and allow to adhere (TIP: Use a large paper clip to hold the fabric in place until glue dries)
- Punch holes in sides of cone for elastic band
- Insert elastic in one side and knot. Using your child as a model, place the hat on her head and measure needed length of elastic, trim, insert and tie
And did you notice that she is also wearing a matching pumpkin t-shirt (and that both the hat and t-shirt match the fabric from the Candy Corn collection dessert table)? Using a little Wonder Under we made a quick t-shirt too (or there are iron-on kits available at any craft store). And since my mom has every sewing gadget imaginable, she outlined the pumpkin in orange for that little extra touch. And, don’t miss the post on DIY Halloween Masks!
As always, I hope you’re inspired to craft, bake, create and celebrate!
INSTAGRAM | FACEBOOK | PINTEREST | GOOGLE+ | TWITTER | YOUTUBE | BLOGLOVIN
 DIY Halloween masks