Burlap ribbon is the easiest way to make a simple rustic garland. And in only 10 minutes! Join me in making this DIY burlap garland and creating a winter wonderland mantel!

To make a jingle bell burlap garland you’ll need:
- burlap ribbon
- red cross-stitch thread
- needle
- jingle bells
- scissors
- optional: adhesive like glue dots or Command Strips to attach to mantel
The steps are simple:
- Measure – measure your mantel and then multiply that length by six. This will give you a decent estimate of how much burlap ribbon you’ll need. To that number, add 24 inches for each side and 36 inches for the center ribbon.
- Thread – start 12 inches in and start bunching the ribbon in 2.5 to 3 inch increments
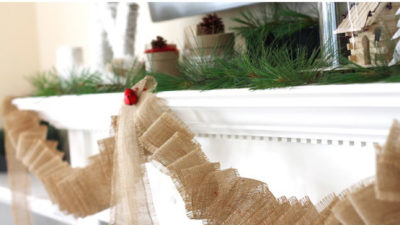
- Hang and spread – hang the garland with adhesive and using your fingers spread each section apart roughly the same distance so you have the look above.
- Embellish – add jingle bells to both ends and fold a bow with jingle bells for the center.
Did you see all the elements in my mantel? I created it for a project with HGTV and JoAnn Fabric and Craft Stores.

Get the detailed tutorial for my Joy To The World letters, sweet little Kraft gift boxes embellished with icicle wool and pinecones, log cabin snow globe and plastic spoon Christmas trees to whip up your own winter wonderland!
As always, I hope you’re inspired to craft, bake, create and celebrate!
INSTAGRAM | FACEBOOK | PINTEREST | GOOGLE+ | TWITTER | YOUTUBE | BLOGLOVIN
DIY Jingle Bell Burplap Garland & Winter Wonderland Christmas Mantel seen first here on The Celebration Shoppe
 DIY Log Cabin Snow Globe & Winter Wonderland Christmas Mantel