All the costumes, the candy and the excitement of Halloween make me giddy. Now imagine you’re a little kid and you have food allergies. All the other kids around you are munching down on their Halloween treats and you’re just watching because you can’t have any. Halloween just became a little less magical.
Well I’m so excited to share the Teal Pumpkin Project with you. For those of you that visit me often know my youngest son has food allergies. I do everything I can to guard him from the types of disappointments that I shared above. It’s not easy because although we’re hypersensitive to his needs, most people are not only because when you don’t have a child or know someone with food allergies, it’s not top of mind. That is where the Teal Pumpkin Project comes in. It’s a brilliant idea that allows you to make all the little ghosts and goblins in your neighborhood feel welcome on Halloween.

The Teal Pumpkin Project is simple.
You can do like me and whip up a teal pumpkin to share the news with all the trick-or-treaters and their families that grace your doorstep on Halloween night. Just make sure that you have plenty of allergy friendly treats or non-food treats (e.g., crayons, bubbles) to share with any little ones that come up. Just a note, they won’t always tell you. My son just takes the goodies and then swaps the things he can’t have with his brother (or me… I keep a stash of his favorites) at the end of the night. This is why I wrote the message directly on my pumpkin for the parents to read. Or, the Teal Pumpkin Project website has free printable you can download if you’re not feeling crafty… or run out of time! {wink}
If you’re feeling crafty, I’ve got a great way you can share the Teal Pumpkin Project message!
Let’s whip up a teal pumpkin for your front porch! By the way, I made the Frankenstein pallet to stand with my pumpkin so no one in the neighborhood will miss it! I’ll share that easy DIY tomorrow.
For the teal pumpkin, you’ll need a few things from JoAnn Fabric and Craft Stores:
- Spray paint
- Faux pumpkin
- Cricut Explore Air
- Cricut cutting mat (light weight adhesive works best for vinyl and window cling)
- Cricut white vinyl
- Cricut midnight black vinyl
- Cricut Transfer Tape
- Cricut Design Space, lettering & jack-o-lantern face
Tip: If you don’t have a Cricut, no worries. Grab a stencil and some paint! It’s important that all the little ones have a wonderful Halloween!

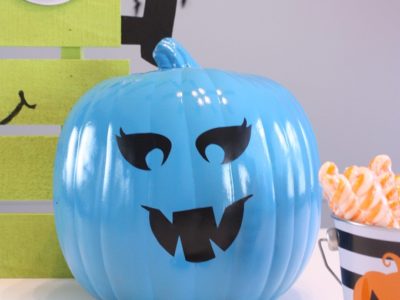
The DIY steps for making this jack-o-lantern are simple:
- Paint – spray paint the pumpkin. It might take a few coats. Allow to dry overnight.
- Vinyl – using my Design Space file, cut out the letters and designs in white and black. Apply to pumpkin using transfer tape.
This is the back of my allergy message. Isn’t she cute?! {wink}
I hope you’ll support this wonderful message. By the way, I also have some fun free Halloween printables you can use to decorate your front porch: 3-D Bat Banner in Orange and Black and a sweet Green and Black Frankenstein Banner. I hope you’ll grab both!
As always, I hope you’re inspired to craft, bake, create and celebrate!
INSTAGRAM | FACEBOOK | PINTEREST | GOOGLE+ | TWITTER | YOUTUBE | BLOGLOVIN
This easy pumpkin project is sponsored by JoAnn Fabric and Craft Stores. Thank you for supporting my wonderful sponsors. They make it possible for me to keep the ideas coming! All content, ideas, photography and opinions are that of my own and I’d have it no other way!
 Haunted Halloween Party & Paper Crafts Partnership with Darice