
The Celebration Shoppe is a custom invitation and creative party decor company with over 50 birthday party, baby shower, and holiday party proprietary collections. We’re so very pleased that you’ve either purchased or are interested in purchasing from our shoppe.
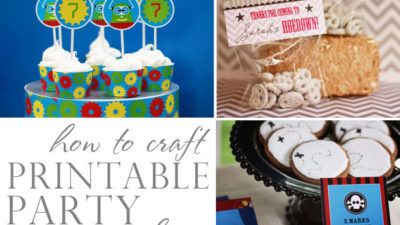
This is where you’ll find all the “how to” for crafting our printable party designs. The most commonly asked questions are regarding paper and printer quality. If you’re concerned about either, we recommend you e-mail your order to your local office supply store (e.g., Kinkos) and let them print for you. You’ll find paper weight recommendations, tools and tips with each printable’s instructions. And if you still have questions, please feel free to e-mail us at [email protected]. We’re here to help!
Invitations – all invitations are delivered as a high res pdf file via E-MAIL. A few things for you to consider:
- Paper – we recommend #100 cardstock for the best weight quality.
- Size/Trim – the final invitation size is 5×7.
- Envelopes – trimmed invitations fit easily into standard 5 ¼ x 7 ¼ envelopes (found at craft stores such as JoAnns Fabric and Craft Stores, Michaels or online at envelopemall.com)
- Printing – if you’re concerned about your home printer quality, you can print at your local office supply store.

Thank you notes – all thank you notes are delivered as a high res pdf file via E-MAIL. The final size is 3 1/4 x 4 3/4″ and are two-up to a sheet as seen above.
- We recommend #100 white cardstock for printing.
- Using the dash marks and a ruler as a guide, score a line using a bone folder on each thank you note for easy folding.
- If you don’t have a bone folder, the back side (without the serrated edge) of a butter knife can be a great substitute.

Cupcake Picks – all cupcake picks are delivered as a high res pdf file via E-MAIL. They come eight-up to a sheet.
- We recommend #100 white cardstock for printing
- Using a 2 1/2″ diameter circle punch (xacto knife or scissors work, too), cut out all round picks
- Apply craft glue to the back of two circles, lay 1/3 of a toothpick on the back of one circle and top with the second circle, designs facing out
- smooth toppers into place and allow to dry for 1-2 minutes
- optional 3-D version: place a foam adhesive square in the center of the cupcake pick you just made, punch scallops out of the same design and apply them to the
cupcake pick being careful to center and/or match up the designs - insert topper into a decorated cupcake
Cupcake Wrappers (for decorative purposes only) – all cupcake wrappers are delivered as a high res pdf file via E-MAIL. They come two-up to a sheet.
- We recommend using 8 1/2 x 11″ paper for printing
- Print and cut–use scalloped edge or other design scissors for added interest
- Wrap snugly around decorated cupcake
- Close with double-sided tape
Cupcake Wrapper Tips:
- If your cupcakes are going to sit for a while before serving, you may want to consider printing your wrappers on a cardstock as it won’t absorb the moisture from the icing as quickly.However it is more difficult to fasten around the cupcake; a touch of hot glue is effective.
- To minimize icing smearing/sticking when you apply your cupcake wrapper, allow icing to firm slightly either in open air for 25-30 minutes or in the freezer for five minutes
Dessert Labels/Food Tags – are delivered as a high res pdf file via E-MAIL. They come as either six-up (square tag) eight-up (rectangle tag) to a sheet.
- We recommend #100 cardstock for printing
- Print and cut with trimmer, scissors or xacto knife
- Use double-sided tape or a craft glue to adhere label to serveware
- Optional: cut straight line in the center top and bottom with xacto knife and thread with ribbon to hang
Menu Mat/ Refreshments Mat – are delivered as a high res pdf file via E-MAIL. They come one-up to a sheet as either 5 x 7″ or 8 x 10″
- We recommend using 8½ x 11” paper for printing
- Print and cut using trimmer or scissors
- Insert into frame
Placecards – are delivered as a high res pdf file via E-MAIL. They come as either six-up (square tag) eight-up (rectangle tag) to a sheet.
- We recommend #100 cardstock for best results
- Print and cut with trimmer, scissors or xacto knife
- Use double-sided tape or a craft glue to adhere label to serveware
- Optional: cut straight line in the center top and bottom with xacto knife and thread with ribbon to hang

Beverage Wrapper –are delivered as a high res pdf file via E-MAIL. They come as two-up to a sheet.
- We recommend using 8½ x 11” paper for printing.
- Print and cut using paper trimmer or scissors
- Wrap snugly around a beverage
- Close with double sided tape
tips:
- these are also great as candle or hurricane wraps for your table
Favor Tags – are delivered as a high res pdf file via E-MAIL. They come as eight-up to a sheet.
- We recommend #100 white cardstock for printing
- Using a 2 1/2″ diameter circle punch (xacto knife or scissors work, too), cut out all round picks
- Apply craft glue to the back of two circles, lay 1/3 of a toothpick on the back of one circle and top with the second circle, designs facing out
- Smooth toppers into place and allow to dry for 1-2 minutes
- Optional 3-D version: place a foam adhesive square in the center of the circle tag, punch scallops out of the same design and apply them to the
tag being careful to center and/or match up the designs - Apply to favor with double sided tape/glue or punch a small hole and attach with ribbon
Candy Bar Favor Wrapper – are delivered as a high res pdf file via E-MAIL. They come as two-up to a sheet.
- We recommend using 8½ x 11” paper for printing
- Use paper trimmer or scissors to cut wrapper
- Wrap snugly around wrapped candy bar
- Close with double sided tape
Cello Toppers – are delivered as a high res pdf file via E-MAIL. They come as two-up to a sheet.
- We recommend using 8½ x 11” paper for printing
- Fill cello bags (typically 4” wide) with favors
- Using the dash marks and a ruler as a guide, score a line on each topper for easy folding
- If you don’t have a bone folder, the back side (without the serrated edge) of a butter knife can be a great substitute
- Close the bag either by punching holes in the topper/bag and threading it with ribbon, or by stapling. A few drops of craft glue, using a glue gun, work well, too.
Napkin Rings – are delivered as a high res pdf file via E-MAIL. They come six-up to a sheet.
- We recommend using 8½ x 11” paper for printing
- Print and cut using trimmer or scissors
- Roll or fold (with or without utensils) your napkins
- Snugly wrap your napkin rings around each
- Close with double sided tape
Straw Slips -are delivered as a high res pdf file via E-MAIL. They come twelve-up to a sheet.
- We recommend using 8½ x 11” paper for printing
- Print and cut using trimmer or scissors
- Apply craft glue to each end of the slip, leaving the middle
- Attach slip to straw, glass stem or bottle neck, matching each side up
- optional flag tip: trim triangle out of the end of the slip
Banners – are delivered as a high res pdf file via E-MAIL. They come either one-up (large) or four-up (small) to a sheet.
- We recommend #100 cardstock for printing
- Print and cut using trimmer, scissors or xacto knife
- Measure same distance from top and side on each card for the ribbon hole punch
or xacto knife slit - punch or cut each card
- arrange on a table how you would like the banner cards to hang, including distance apart
- measure your arrangement, add three feet, at least 18 inches of excess on either side of the banner, and cut ribbon
- thread the ribbon through the hole punches/xacto slits
- hang
Photo Mat – are delivered as a high res pdf file via E-MAIL. They come one-up to a sheet.
- We recommend #100 cardstock for printing.
- Print and cut (a paper trimmer is the best tool for the interior cut, around the photograph, to ensure a straight line)
- Insert into frame
- Optional: tape 4 x 6 image to the mat so that it doesn’t slip out of place
Sign Element – are delivered as a high res pdf file via E-MAIL. They come one-up to a sheet.
- We recommend #100 cardstock for printing.
- Print and cut using paper trimmer or scissors (small detail scissors work best for sharp turns)
- If hanging from the ceiling, attach ribbon or clear fishing line to the design with a dot of hot glue
- then attach the ribbon or clear fishing line to your ceiling with another dot of hot glue or tie it to a small straight pin (glue should pull away with no damage)
- if framing, no cutting necessary, simply insert into 8×10 frame and display
- if creating a sign, attach ribbon to the bottom of a small dowel and then twist to cover the wood with the ribbon. Add another touch of glue at the top to secure the ribbon and then a final dot of hot glue to attach the sign
Come visit the shoppe and see our latest designs!