Spring is coming and for me that means flowers! Hydrangeas are my favorite. My grandmother grew big purple hydrangeas like these in her garden, so when I think about making an Easter flower arrangement, I think hydrangea. These hydrangea flower arranged in a monogrammed galvanized basket will make a beautiful Easter display.

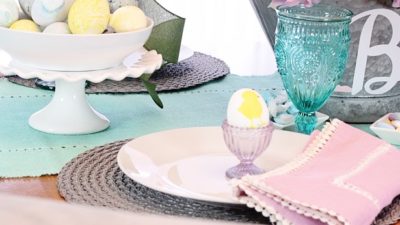
My family has a big Easter brunch each year in Alabama with aunts and uncles and cousins… and I’m always wishing I could be there. Envision cute little kids in pastels running around with Easter baskets, more food than can possibly be consumed, hugs all around and laugh out loud jokes. Well this year I’ll be there in person and not just watching facebook for random pictures and updates! Don’t get me wrong, I host a little brunch here in Ohio for my boys and my lovely in-laws and we have a good time. We’re just missing about 30 guests. {wink}
Okay, let’s talk how to make an easy spring hydrangea flower arrangement with a monogram galvanized basket in less than 30 minutes!
For the flower arrangement, you’ll need (all available in Jo-Ann Fabric and Craft Stores floral section):
- Hydrangea, 6 stem bundles
- Galvanized flower basket
- Green ribbon
- Floral foam, half circle
- Wire cutters
For the monogram, you’ll need (all available in the Jo-Ann paper crafting section):
- White vinyl
- Pink vinyl
- Cricut Explore
- Cricut light adhesive mat
- Design Space art file

Arranging the flowers is super easy:
- Cut – cut bundle flowers into single stems
- Insert – insert flower stems into floral foam at varying heights making sure to fill in all the gaps so it looks very full
- Greenery – sometimes when you trim flowers, even artificial ones, you lose some of the leaves. Save them and fill in any gaps, as well as pull some out in the front of the arrangement
- Ribbon – it doesn’t always have to be tied, sometimes a beautiful drape works perfectly

Let’s add a DIY monogram. I mean, I’m southern, we like adding monograms to everything… {grin}:
- Design – in Design Space, edit my design with your family initial and any spring or Easter element that works for your décor
- Cut – place vinyl on the Cricut mat and cut
- Apply – for simple designs (like these) you can apply them by hand, but for more complex designs with lots of small parts, use Transfer Tape. You’ll be glad you did!

And while you have your Cricut all warmed up, whip up a quick Easter tee shirt too. Hop over for all the easy DIY. (See what I did there!?! Love a pun!)

If you like the idea of all-natural Easter egg dyes, I have five recipes for you!

You can also download my Free Printable Bunny Ears and make some cute Easter bunny donuts. See you there!

I hope your Easter is bright, festive and full of laughter! And as always, I hope you’re inspired to craft, bake, create and celebrate!
INSTAGRAM | FACEBOOK | PINTEREST | GOOGLE+ | TWITTER | YOUTUBE | BLOGLOVIN
This post is sponsored by Jo-Ann Fabric and Craft Stores. Thank you for supporting my wonderful sponsors. They make it possible for me to keep the ideas coming! All content, ideas, photography and opinions are that of my own and I’d have it no other way!
Easter Brunch – Hydrangea Flower Arrangement With Monogram Basket seen first on The Celebration Shoppe.
Shared on Nifty Thrifty Things.
 Caramel Popcorn Recipe Made For Sharing