This is a sponsored conversation written by me on behalf of Cricut. The opinions and text are all mine.
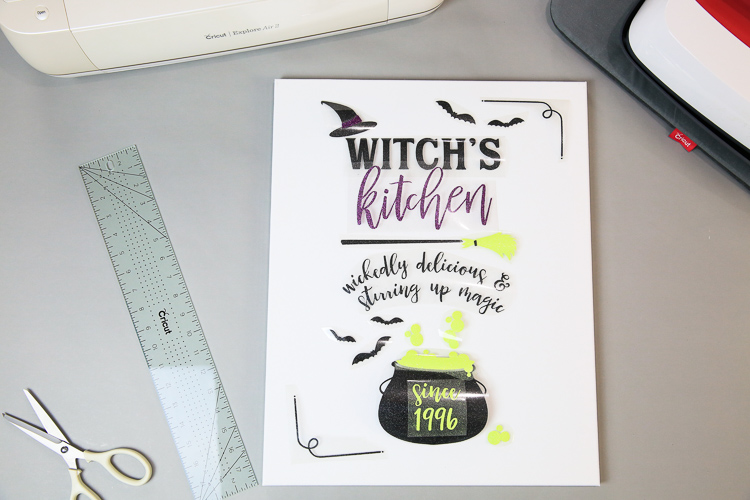
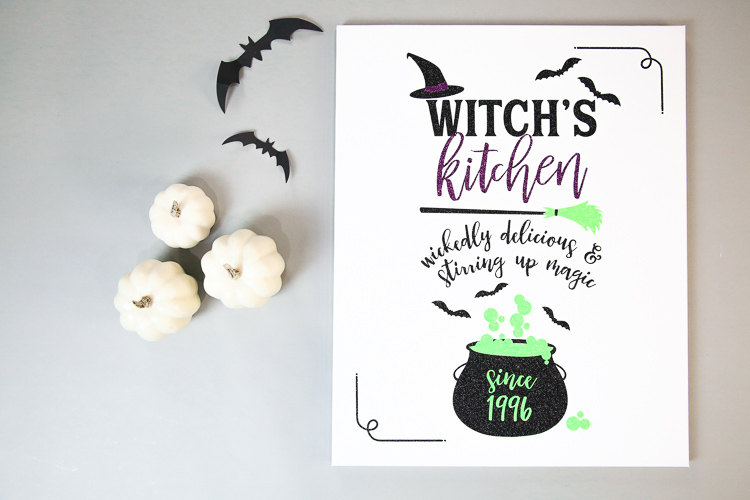
Let’s make a Witch’s Kitchen Halloween sign with our Cricut! I shared in my last post, Bee Witch Halloween Costume with the new Cricut EasyPress 2 Mini, how much I love this time of year. It’s the kickoff to all the holiday crafting! I start with Halloween in late August and don’t let up until December 15th or so. It’s wonderful! :)
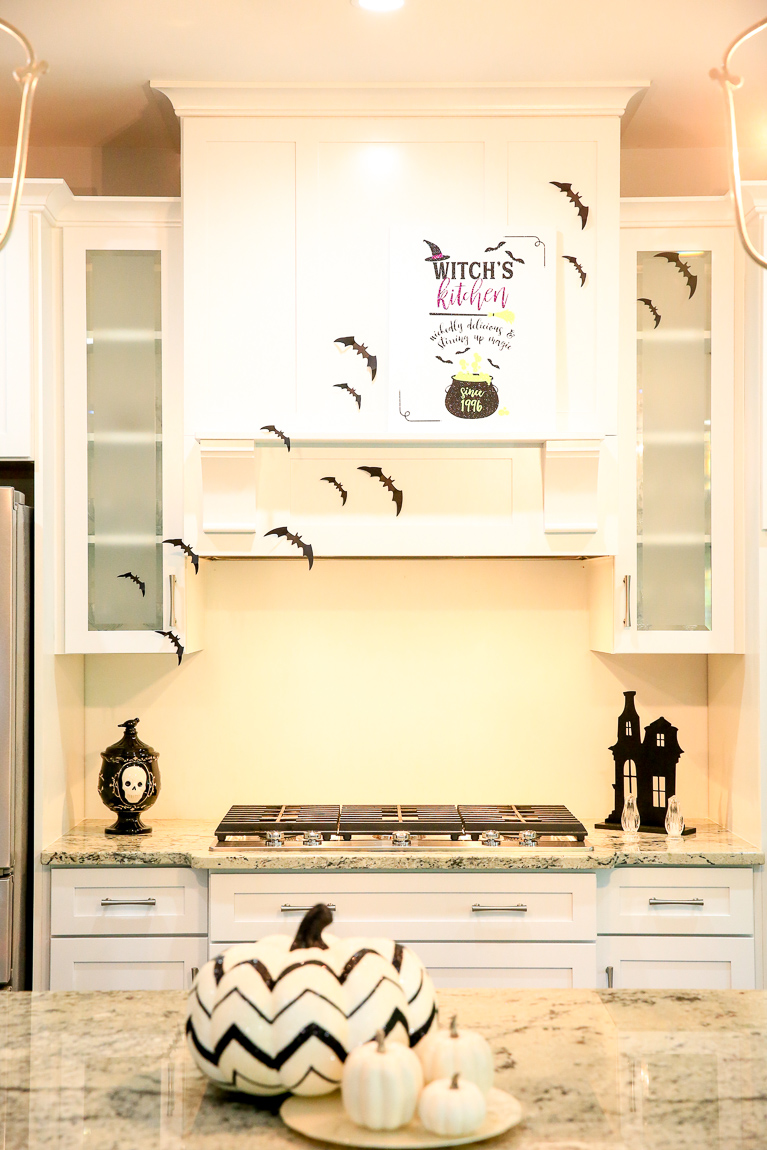
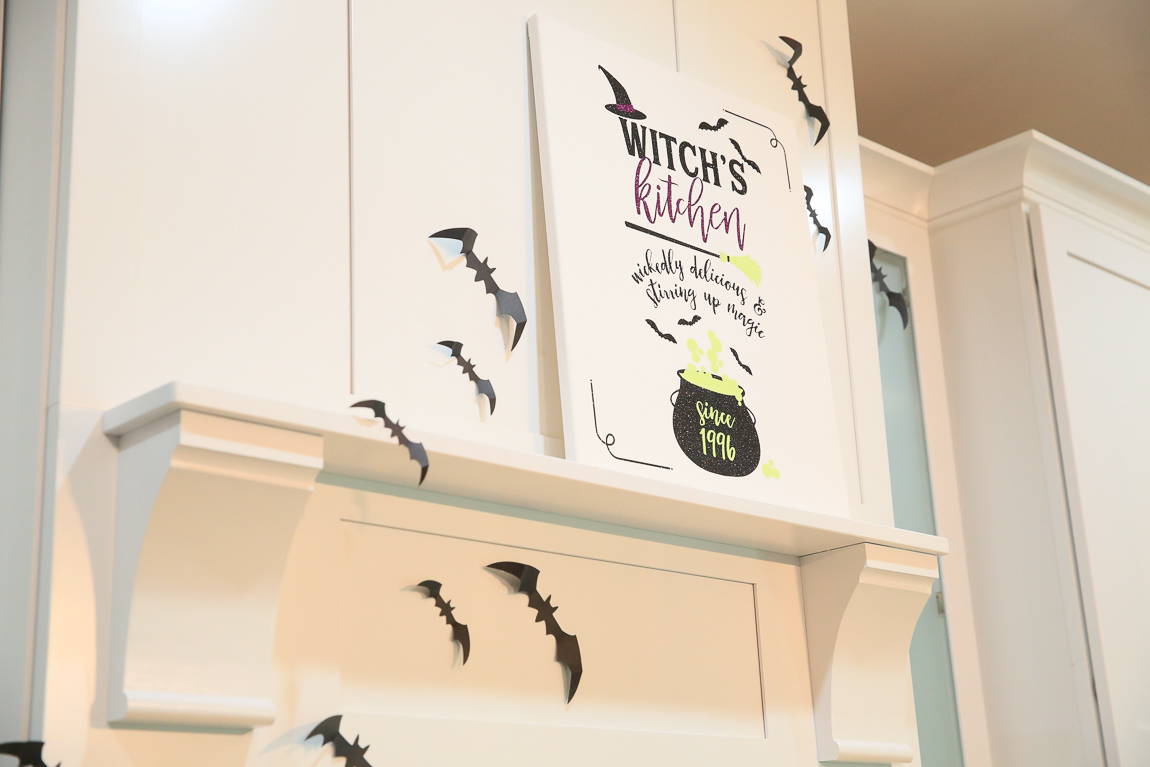
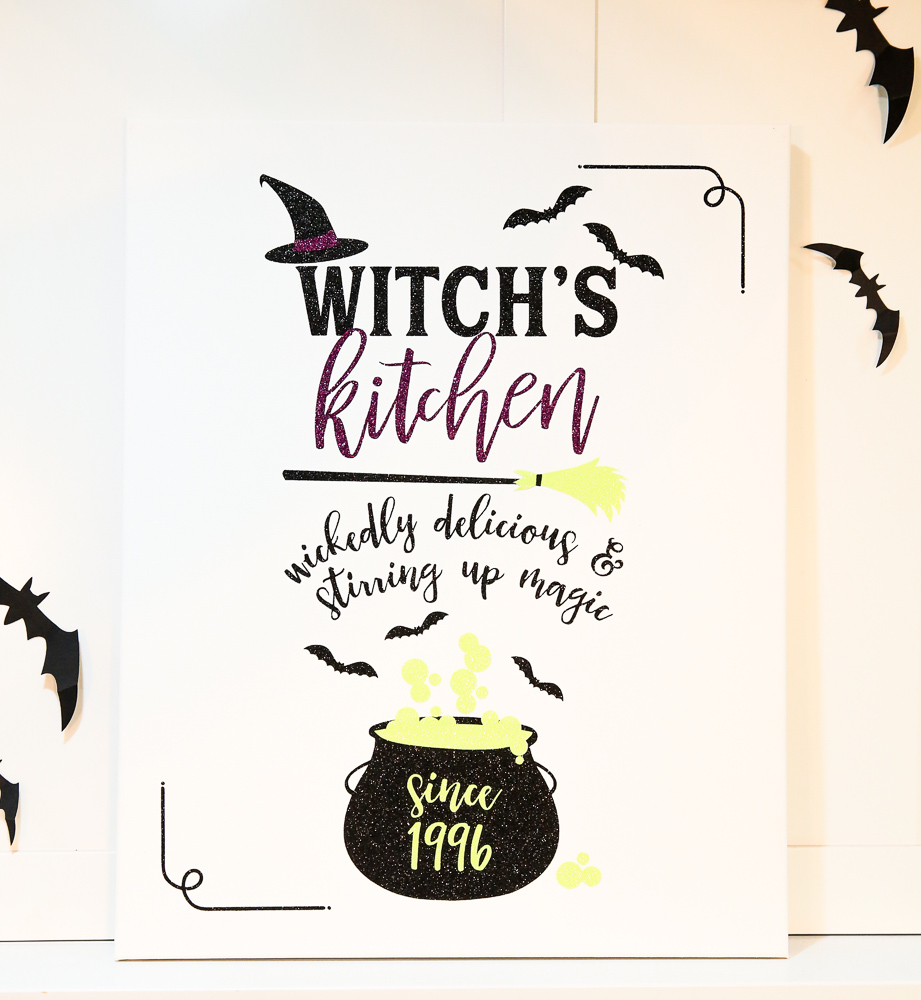
This little canvas art will sit on my kitchen mantle! I personalized it with the year I married my hubby and I’ve provided numbers 0-9 in the art file so you can personalize it in Design Space for the year you married, bought your house, had kids, etc! You can download it here!
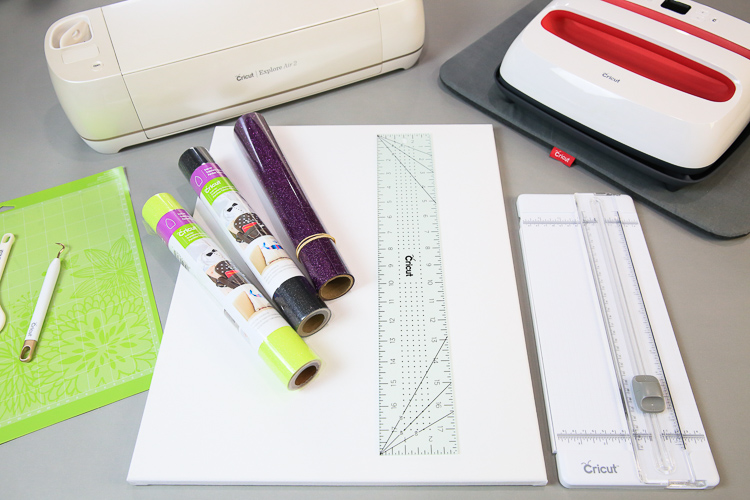
WHAT YOU NEED TO MAKE A HALLOWEEN SIGN
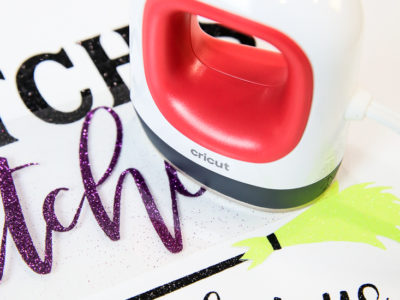
So let’s get started and I’ll show you how you can make this personalized Halloween sign in just minutes with your Cricut. I used my Cricut Explore Air 2 and my EasyPress 2 Mini!
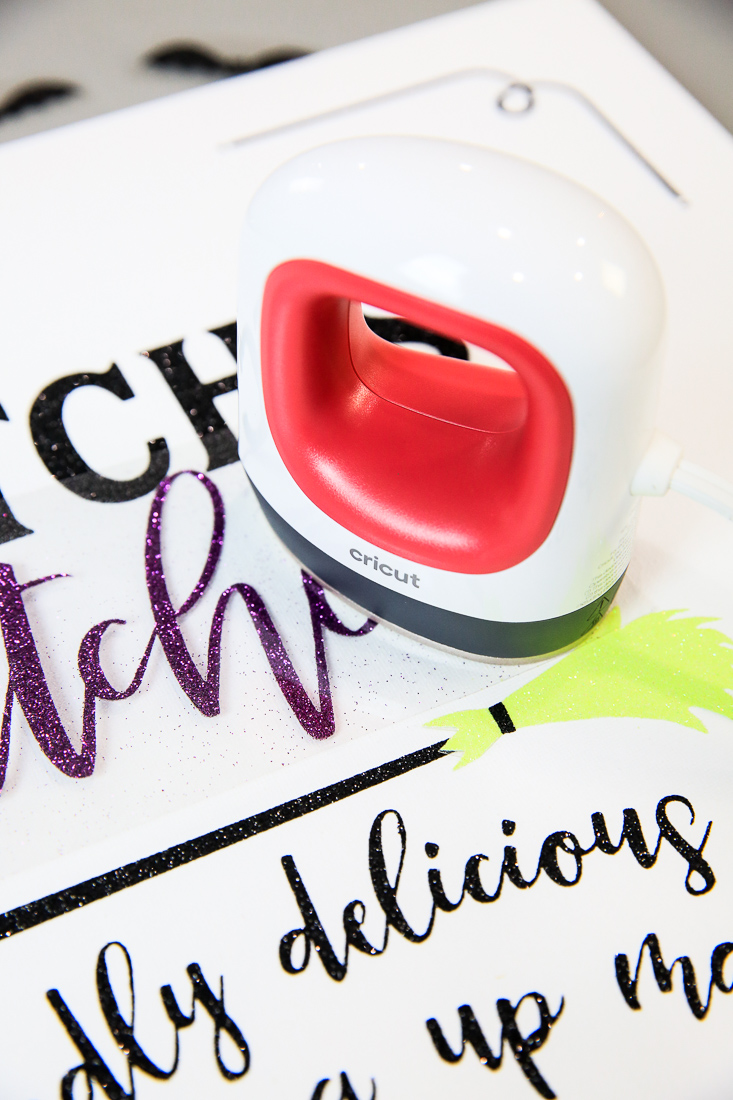
You might be thinking, why did she use a Mini on such a large canvas. Well, it took me by surprise too! But once I got started I realized that the Mini allowed me to be able to measure as I went and press one small element at a time, so everything was perfectly spaced. It worked beautifully! Want to learn more about the EasyPress 2 Mini? I wrote about it here.
- Cricut Maker or Cricut Explore Air 2
- Standard Mat
- Glitter Iron-On
- EasyPress 2 or EasyPress 2 Mini
- Mat for EasyPress 2
- Weeding Tool
- Canvas
- Design Space
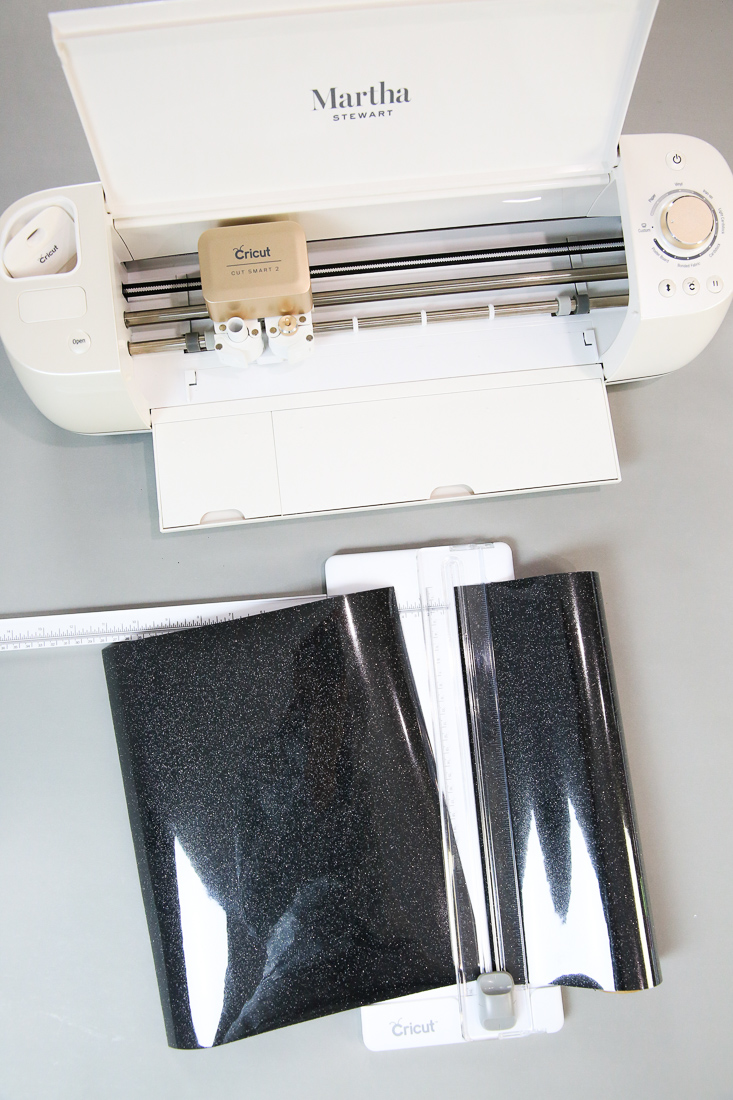
HOW TO MAKE A IRON-ON CANVAS
If you’ve ever used your Cricut to make any iron-on project, this is pretty much the same. The only thing you is, you need to be able to fit your EasyPress mat, or towel, under and inside the frame of the canvas so that it’s supported while you press.
- Design – Create a design in Cricut Design Space, using their well over 100,000 images as of this week! Yay! Design your own, or grab mine!
- Upload and Size Design – watch my video below to see how I do upload layered designs, change colors and size designs to fit my canvas. You can find this design in my Etsy Shop.
- Cut – following Design Space, cut each element from glitter, foil, everyday, holographic and more!
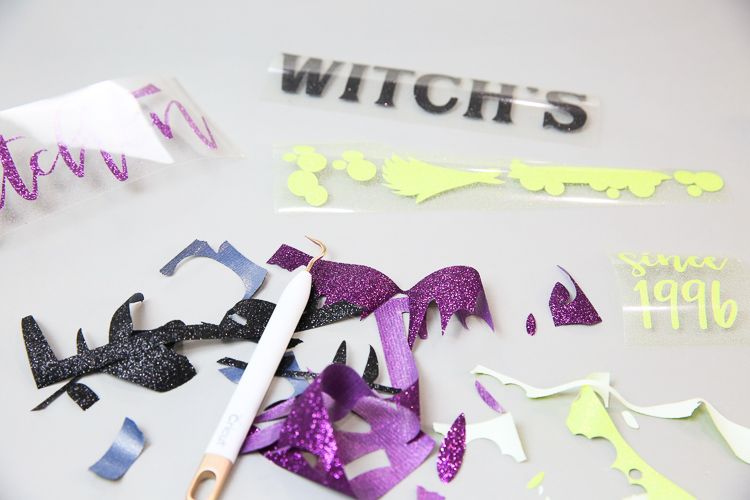
- Weed – carefully weed all the negative space out of your design.
- Measure and Press – I used the EasyPress 2 Mini with great success on this project. No matter which you use, measure and measure again!
HOW DO I UPLOAD LAYERED DESIGNS TO CRICUT DESIGN SPACE?
I’m using my Witch’s Kitchen Halloween canvas design as an example, but these tips are good for any layered design that you upload to Cricut Design Space. In this video you’ll learn:
- Difference Between Uploading SVGs and PNGs
- How To Upload Layered Images To Cricut Design Space
- Changing Colors of Layered Files in Cricut Design Space
- Sending Layers To Mat, Attached, For Easy Application Once Cut
By the way, I’m making videos for all my new crafts and I’d love for you to join me and subscribe to my YouTube Channel. I make new videos at least once a week!
MORE CRICUT HALLOWEEN IDEAS
- Minnie Mouse Halloween Costume with Cricut
- Halloween Hocus Pocus Tee & Cut File
- Go Jump In The Leaves Pennant & Cut File
- I Drive A Stick Coffee Mug & Cut File
As always, I hope you’re inspired to craft, create and celebrate!
INSTAGRAM | FACEBOOK | PINTEREST | TWITTER | YOUTUBE
INSTAGRAM | FACEBOOK | PINTEREST | TWITTER | YOUTUBE
This post contains affiliate links, which means if you purchase something through this post I will earn a small fee from the retailer at absolutely no cost to you. They pay me for bringing you to them and I use it to keep the craft room stocked and the coffee pot working! Don’t worry. All content, ideas, photography and opinions are that of my own and I’d have it no other way!
 Bee Witch Halloween Costume With New Cricut EasyPress 2 Mini + Video